
This tutorial will show you a fun way of creating monochrome pixel art in Aseprite by using a greyscale image and blend modes.
Introduction
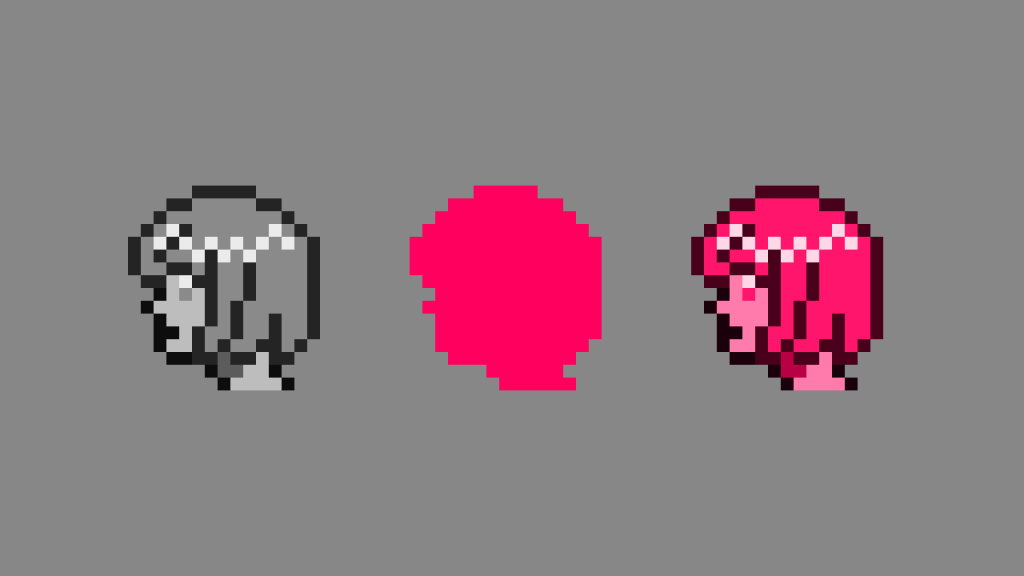
For this tutorial I will use this anime style girl sprite which I made in Aseprite.

Greyscale
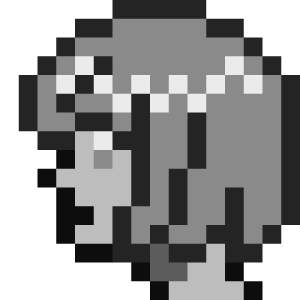
The first step is to convert the sprite to greyscale, by replacing the sprite colours with greyscale colours. I recommend you do this by hand, since you want to create a good contrast between the darker and lighter areas of the image.
You can select greyscale colours by using the HSV colour format. Change the brightness for each colour, and set the saturation of every colour to 0. It doesn’t matter what the hue is set to.
My greyscale sprite looks like this:
Blending
Next we will overlay a single colour on top of the greyscale image, using a separate layer.
1. Create a new empty layer, and call it blend.
2. Select the rectangular marque tool, or press ‘m’.
3. Click on the greyscale layer, then left click somewhere in the canvas.
4. Then hold Ctrl and left click on the greyscale layer. This should select all of the non-transparent pixels in the image.
5. Click on the blend layer, and fill it with a colour of your choosing.

6. Right click on the blend layer, go to properties and select ‘Overlay’ for the ‘Mode’.
You should now have a pretty cool looking image, like so:

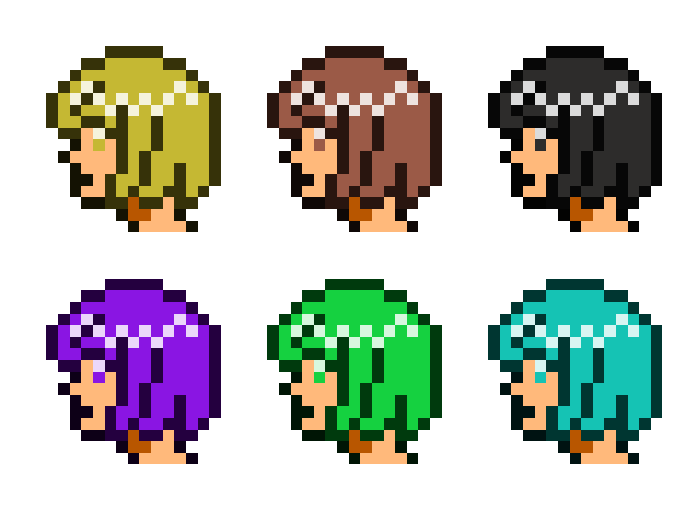
More hues
You can break away from the monochrome look, by using different colours on the blend layer if you wish. For example you could use a different colour for the skin tone on the blend layer.

The result would look like this:

Experiment
Feel free to have fun experimenting with different colours and blend modes.
Conclusion
Thank you for reading this tutorial. Let me know in the comments section if you enjoyed it, or have any questions!
See more pixel art tutorials here.

2 responses to “Creating monochrome pixel art in Aseprite”
Love this! Very interesting. Thanks for sharing 🙂
Thank you Lucy Rebecca, you have a lovely website!