
Learn how to create a bokeh effect in a GLSL shader.
Introduction
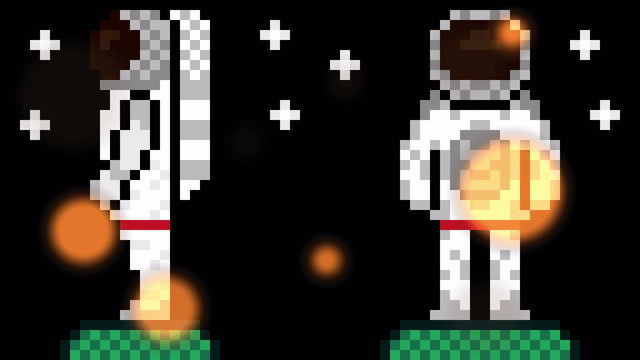
“Bokeh comes from the Japanese word boke (暈け or ボケ), which means ‘haze’ or ‘blur’. The ‘h’ was introduced to help English speakers pronounce the word correctly [BO – KEH]. The official definition translates as: “the way the lens renders out-of-focus points of light.”. “
What is Bokeh Effect in photography? | Adobe
Constants
First define some constants, starting with the value for PI.
#define PI 3.14159265359Next define some constants for the following degree angles in radians: 0, 90, 180, 270.
#define RAD_ZERO 0.0
#define RAD_90 PI / 2.0
#define RAD_180 PI
#define RAD_270 RAD_90 * 3.0
Finally define some constants for the radius of the different circles.
const float SMALL = 0.05;
const float MEDIUM = 0.1;
const float LARGE = 0.15;
Uniforms
We will now create some uniforms, which we will use to customise the effect outside of the shader.
First we need to pass in the image size.
uniform vec2 resolution = vec2(1.0, 1.0);Then we will create uniforms for the brightness and opacity of the bokeh circles.
uniform float brightness = 1.0f;
uniform float opacity = 1.0f;
We will pass in the time in seconds, and use it to animate the bokeh circles later on.
uniform float timeSeconds = 0.0f;Finally we will pass in a tint value and use it to tint the bokeh circles. Orange by default.
uniform vec3 tint = vec3(0.69, 0.365, 0.11);Circle
We will need a function to get the distance to the centre of a circle, like so:
float Circle(vec2 pos, float radius)
{
    return length(pos) - radius;
}
Bokeh circle
Next we will create another function and use it to create the bokeh circles.
float BokehCircle(vec2 pos, vec2 offset, float radius, float angle)
{
    // Position and offset
    vec2 speed = vec2(0.025, 0.025);
    float a = angle + timeSeconds;
    offset += vec2(cos(a), sin(a)) * speed;
    pos += offset;

    // Create circle
    float c = Circle(pos, radius);

    // Smooth
    float s = 0.04;
    c = smoothstep(s, -s, c);

    // Adjust opacity over time
    c *= sin(a) * 0.5 + 0.5;

    return c;
}
The function takes the following arguments: position, offset, radius and an angle.
float BokehCircle(vec2 pos, vec2 offset, float radius, float angle)The position will be from the centre of the image. So we can use the offset to offset the position of the circle. The cos and sin functions are used to make the circle orbit it’s starting position. Hence why we pass in the angle added with the time in seconds. The speed value determines the orbit distance.
vec2 speed = vec2(0.025, 0.025);
float a = angle + timeSeconds;
offset += vec2(cos(a), sin(a)) * speed;
pos += offset;
We create the circle using the Circle function. Then smooth it using the smoothstep function.
float c = Circle(pos, radius);
float s = 0.04;
c = smoothstep(s, -s, c);
Finally we will adjust the opacity of the bokeh circles over time, so they fade in and out. Then return the circle distance value.
c *= sin(a) * 0.5 + 0.5;
return c;
Pixel colour
Now we will get the texture pixel colour from inside the main function.
vec4 pixel = texture(textureUnit, texCoord);Aspect ratio
Next calculate the aspect ratio using the resolution uniform.
vec2 aspect = resolution.xy / min(resolution.x, resolution.y);Position
Create a position vector from the centre of the image, and aspect ratio correct it.
vec2 pos = (texCoord - 0.5) * aspect;Create circles
Now we will create the bokeh circles.
First we need a variable to hold the circle distance values, and a variable for the offset. The half size variable is half the distance from the centre of the image, to the edge of the image.
float c = 0.0;
vec2 offset = vec2(0.0);
vec2 halfSize = aspect / 2.0;
The bokeh circles can be created like so:
offset = vec2(halfSize.x * 0.5, -halfSize.y * 0.75);
c += BokehCircle(pos, offset, MEDIUM, RAD_270);

offset = vec2(halfSize.x * 0.75, halfSize.y * 0.5);
c += BokehCircle(pos, offset, LARGE, RAD_90);

offset = vec2(halfSize.x * 0.25, halfSize.y * 0.25);
c += BokehCircle(pos, offset, SMALL, RAD_ZERO);
Each circle uses the same position and a different offset, based on the percentage of the half size variable. The small, medium and large variables control the size of the bokeh circles. And the radian values control the starting position for the orbiting.
Add more bokeh circles until you are happy, by playing with different offset, size and radian values.
Brightness
Use the brightness uniform, to scale the brightness of the circle distance totals.
c *= brightness;Mix
Mix the pixel colour with the tint uniform, using the distance of the bokeh circles. The tint is multiplied vs the circle distance so that there is a gradient from the centre of the circle. The colour in the centre of the circle will be brighter than the edges of the circle. The opacity uniform will control the opacity of the bokeh circles vs the pixel colour.
fragColour.rgb = mix(pixel.rgb, tint * c, c * opacity);Alpha
Finally we just need to set the output alpha. First clamp the circle distance value, so that it doesn’t go above 1.
c = min(c, 1.0);Then set the output alpha to a mixture of the pixel alpha and the circle distance. Use the opacity uniform again to control the opacity of the bokeh circles vs the pixel alpha.
fragColour.a = mix(pixel.a, c, c * opacity);Conclusion
Thank you for reading this tutorial. Let me know in the comments section if you enjoyed it, or have any questions!
