
Learn how to create a circle transition in Shadertoy using the GLSL programming language. Useful in video games and movies when changing scenes.
Introduction
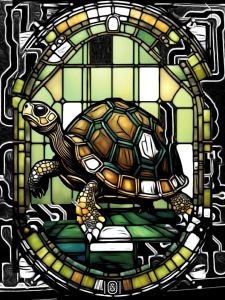
For this tutorial I will use these fantastic images from Astro Planes Art.

Constants
First define a constant for smoothing the circle’s edges.
const float SMOOTHING = 1.0;
Next define a constant which controls the transition speed.
const float SPEED = 0.68;
Lastly create a constant for the background colour.
const vec4 BACKGROUND = vec4(0.0, 0.0, 0.0, 1.0);
Circle function
Create a circle function, which will return the distance to the centre of a circle.
float Circle(vec2 pos, float radius)
{
    return length(pos) - radius;
}
UV coordinates
Define the UV coordinates inside the main function.
// Normalised pixel coordinates (from 0 to 1)
vec2 uv = fragCoord / iResolution.xy;
Aspect ratio
Calculate the aspect ratio using the resolution.
float aspect = 1.0 / min(iResolution.x, iResolution.y);
Position
Create a position variable by offsetting the UV coordinates. Then scale the position variable with the aspect ratio multiplied against the resolution of the screen. This will make the circle always appear as a circle, and not as an ellipse.
vec2 pos = uv - 0.5;
pos *= aspect * iResolution.xy;
Progress
Define a progress variable using a sine wave, time and the speed constant from earlier. Convert the progress value to the 0 to 1 range.
float progress = sin(iTime * SPEED) * 0.5 + 0.5;
Sync the texture switching with the scaling. So that the texture changes at the same time as the circle expands and contracts. The easiest way to understand this is to switch the progress value with the ‘p’ variable, and see what happens.
float p = abs(progress - 0.5) * 2.0;
Radius
Define a radius variable by using the ‘p’ variable and the mix function. Mix the minimum radius with the maximum radius. This will animate the radius.
float radius = mix(0.0, 1.1, p);
Circle
Create the circle using the position and radius variables, and the circle function we created earlier.
float c = Circle(pos, radius);
Edge smoothing
Smooth the edges of the circle. Define a smooth value using the smoothing constant from earlier and the aspect ratio. Use the smoothstep function with the circle distance and the smooth value.
float s = SMOOTHING * aspect;
c = smoothstep(s, -s, c);
Textures
Add two textures to the first two channels in Shadertoy. Then get the colours from both of the textures.
vec4 from = texture(iChannel0, uv);
vec4 to = texture(iChannel1, uv);
Output
Mix both texture colours based on the result of the step function. The step function is checking if the progress value is less than 0.5. If it is, then the first texture will be used. Else the second texture will be used.
vec4 col = mix(from, to, step(0.5, progress));
Finally mix the current colour with the background colour based on the circle size.
fragColour = mix(BACKGROUND, col, c);
Easing
Optionally apply an easing function to the ‘p’ variable.
// https://easings.net/#easeInOutCubic
float EaseInOutCubic(float x)
{
    return x < 0.5 ? 4.0 * x * x * x : 1.0 - pow(-2.0 * x + 2.0, 3.0) / 2.0;
}
Using the easing function:
p = EaseInOutCubic(p);

Shadertoy
Full Shadertoy code and demo available here.
Conclusion
Thank you for reading this tutorial. Let me know in the comments section if you enjoyed it, or have any questions!

3 responses to “Circle screen transition Shadertoy tutorial”
Thank you AD for using my art work brother!!!
No problem, thanks for letting me use it! The artwork looks great, and it fits the tutorial perfectly 🙂
good stuff flexible products always work for everyone!!