

This tutorial will show you how to add shadows and highlights to a pixel art image using the opacity slider.
Introduction
The tutorial will use the Aseprite image editor, but any image editor which lets you change the opacity of a colour should be more than suitable.
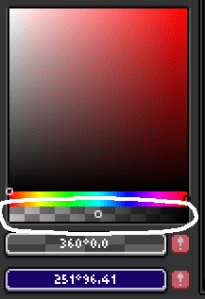
The colour picker and opacity slider look like this in Aseprite.

I have circled the opacity slider in white, so you know where to find it.
The tutorial will use the following house image as a starting point.

Roof Shadow
I first created a shadow underneath the white roof plank. To do this, pick the colour black, then drop the opacity to around 50%. You can then use the pencil tool and SHIFT + CTRL keys to create a line at a fixed angle. Do this twice underneath the roof plank on the blue area of the house, so it looks like the image below.

Next use the colour picker tool to select the shadow colour. Then drop the opacity to around 50% again. Then draw two lines below the previous shadow using the pencil tool.

Follow the previous step one more time. Select the new shadow colour, drop the opacity by 50%, and draw two more lines below the shadow you just drew. You can do this as many times as you want.

Next we will create a shadow in the white area below the roof plank on the sides of the house. Select black again, drop the opacity to around 50%, then draw two lines, so that they line up with the other lines you drew.

Select the shadow colour, drop the opacity by 50%, then draw another two lines.

Repeat the previous step, one more time. We are now done with the roof shadow.

Roof Highlight
Select a colour which is brighter than the roof colour, and close to white. We will now draw two lines at the top of the roof planks, to create a highlight.

Select the previous highlight colour, and drop the opacity to around 50%. Then paint two lines below the previous lines. We are now done with the roof highlights.

Window Highlight
Next we will paint the window highlights. Since the window frame colours match the roof colours, we can reuse the two roof highlights colour. You can select both of the highlight colours with the selection box, then create a brush with CTRL + B. Then use this brush to paint the highlights to match the image below.

Window Shadow
Now we will paint the window shadows. We can reuse the shadow colours at the sides of the image, below the roof planks. Again, you can select the shadow colours with the selection box, then create a brush with CTRL + B. Then paint the shadows onto each window frame. Repeat the process below the window frames, using the blue shadow colours. But notice how I made the shadows below the window frames more curved, and less like rectangles.

Darker Shadows
If you want to make the shadows darker, then you can select black, and drop the opacity to a low value. Then just draw on top of the existing shadows. Each time you do this, it will darken them.

Larger Shadows
You can also make the shadows larger, they don’t need to be just a single line per colour.

Feel free to experiment with shadow size and opacity to see what you can come up with!
The images above are large so it’s easier to see the shadow and highlights. But pixel art should be displayed from further away. So here is the last three houses at a smaller scale.

More Houses
Here are four different coloured house designs with vertical planks, which also use the technique we just learned to create shadow using opacity.

Conclusion
Thank you for reading this tutorial! You have learned how to add shadow and highlights to an image by using the opacity slider. This technique is great for adding fast shadows to an image. However if you wish to work with a more limited colour palette and you have a more complex image, then this technique will introduce many colours to the scene. If you are not worried about the number of colours in your image, then this technique can be very useful!
