

Learn how to easily create a seamless brick tile texture in Aseprite by using tiled in both axes.
Aseprite
Aseprite is an image editor designed primarily for pixel art drawing and animation.
Step 1
Create a new 16×16 sprite on a transparent background.
Turn on tiled in both axes, by going to:
View –> Tiled Mode –> Tiles in Both Axes
Step 2
Fill the background with a solid colour which will represent the midtone.
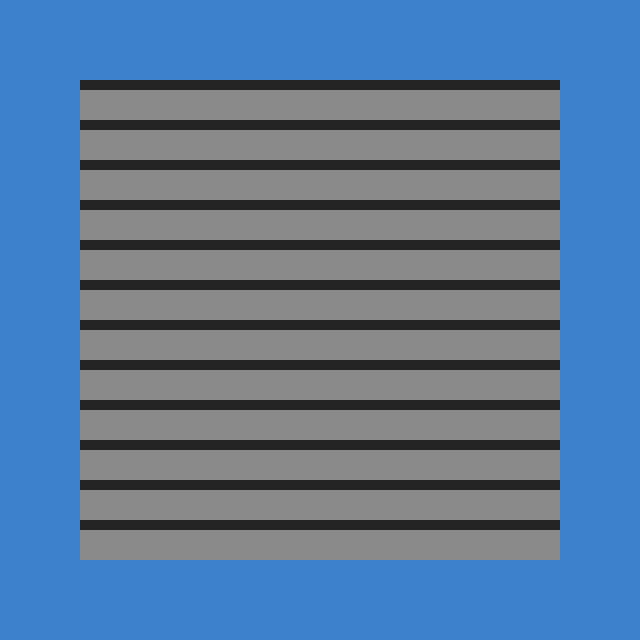
Pick a darker colour and draw some horizontal lines using the pencil tool. You can hold shift to create lines. You can spread out the lines equally height wise or you can have different heights. I am going to spread out the lines equally.
Note the blue background below is just to make the texture easier to see.
Step 3
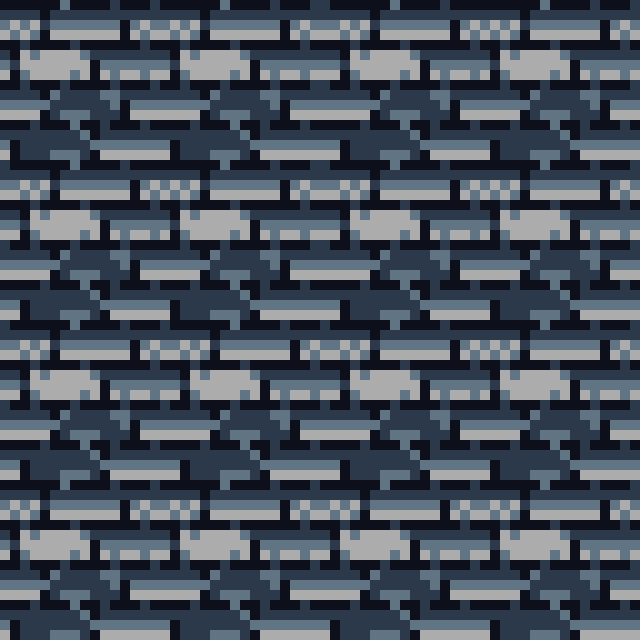
Next add the highlights and shadows. Use a colour which is lighter than the midtone for the highlights. And use a colour which is darker than the midtone for the shadows. This will create a tiled gradient look.

Step 4
Use the dark colour which you used to draw the lines earlier, to draw the vertical lines to create the individual bricks. Notice how each line of bricks alternates. So the first and third lines are the same, and the second and fourth lines are the same.

This may be what you want, but it can look a little to uniform. So making the bricks look damaged in the next step is one way to create a more unique look.
Step 5
Use the shadow colour to break up the line colour by randomly replacing parts of the line with the shadow colour.

Step 6
Optionally use the midtone and highlight colours to add some more texture to random bricks.

Step 7
Optionally create some brighter and darker bricks using the highlight and shadow colours. This will make it look like some bricks are sticking out of the wall or sinking into the wall.

Step 8
You can now change the colours of the bricks using the fill tool. If you turn contiguous off, then you can replace one colour with another colour.
I like to start with the midtone colour, then I hue shift from this colour to get a new highlight and shadow colour.
Conclusion
Thanks for reading this tutorial, let me know in the comments section if you enjoyed it.
See more pixel art tutorials here.
