
This tutorial will show you how to create a simple gaussian blur shader using a kernel. The shader code is written in GLSL.
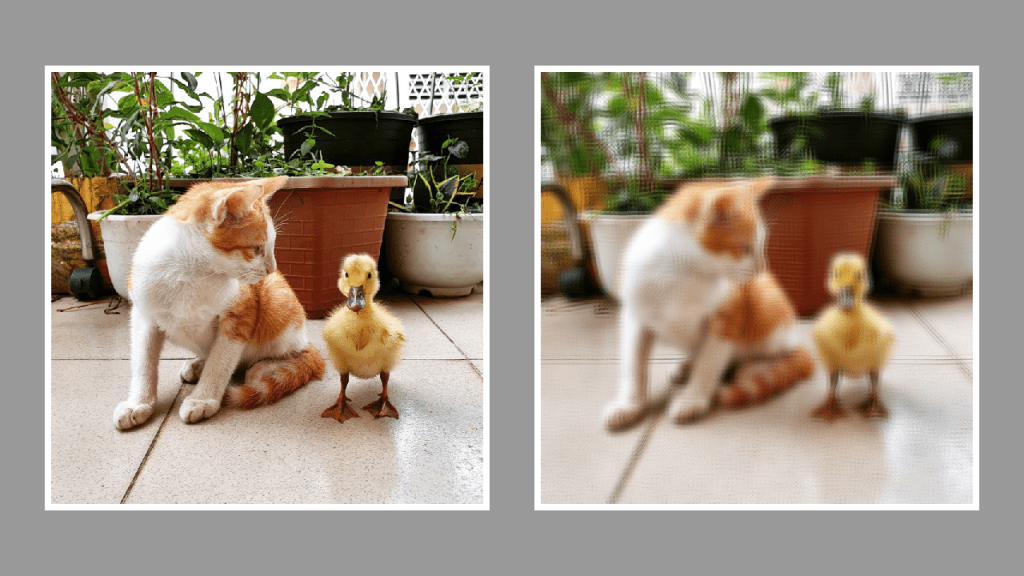
I will use this wonderful cat and duckling picture.

Step 1: Create a kernel
The first thing to do is to create the kernel. This is what the gaussian blur kernel from Wikipedia looks like:

So I will create an array of floats with 9 values.
float kernel[9];
Then set the values to match the image above.
// Top row
kernel[0] = 1f;
kernel[1] = 2f;
kernel[2] = 1f;

// Middle row
kernel[3] = 2f;
kernel[4] = 4f;
kernel[5] = 2f;

// Bottom row
kernel[6] = 1f;
kernel[7] = 2f;
kernel[8] = 1f;
If you add up all the values, you will notice they add up to 16. Which is why we need to divide all the values by 16, so they are in the 0 to 1 range. The centre value corresponds to the current pixel and has a value of 4, this means it will have a larger influence over the final pixel colour. The diagonal values have less influence, since they only have a value of 1.
for(int i=0; i<9; ++i)
{
	kernel[i] /= 16f;
}
Step 2: Sample distance
The sample distance controls how close we sample to the current pixel, and affects how strong the blur is. A value between 100 and 300 should work nicely.
uniform float sampleDistance = 200.0f;
The sample distance is calculated by dividing 1 by the value passed in. You could scrap this calculation and just pass in a small number instead. But it is probably nicer to work with larger integers like 200.
float s = 1.0f / sampleDistance;
Next the value calculated above is used to determine 8 offsets from the current pixel. You could think of the 8 offsets as compass directions. Like North, North East, East, etc. The middle value in the array represents the current pixel, hence why it has an offset of 0 on both the x and y axis.
vec2 offsets[9];

// Top row
offsets[0] = vec2(-s, -s);
offsets[1] = vec2(0, -s);
offsets[2] = vec2(s, -s);

// Middle row
offsets[3] = vec2(-s, 0);
offsets[4] = vec2(0, 0);
offsets[5] = vec2(s, 0);

// Bottom row
offsets[6] = vec2(-s, s);
offsets[7] = vec2(0, s);
offsets[8] = vec2(s, s);
Step 3: Blur
This step does the gaussian blur. We have 9 values in the kernel and 9 offset values. So we loop 9 times in the for loop. Each iteration gets either the current pixel colour or the pixel colour from a surrounding pixel. The kernel value is multiplied against the RGB colour. The value of the kernel determines how much of the colour will be used.
vec3 result = vec3(0.0f);
for(int i=0; i<9; ++i)
{
	result += texture(textureUnit, texCoord + offsets[i]).rgb * kernel[i];
}
fragColour.rgb = result;
Step 4: Pixel alpha
Lastly set the alpha to the current pixel alpha.
fragColour.a = texture(textureUnit, texCoord).a;
Final result
Here are some images using different sample distances.
100

200
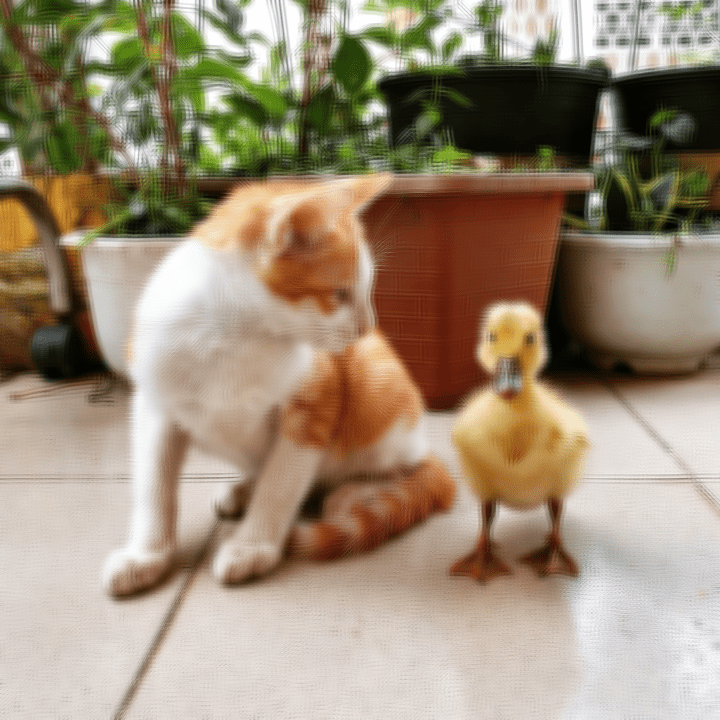
300

Thank you for reading this tutorial, I hope you found it useful!
Check out the next tutorial to see how to apply a sharpen kernel.
Or check out this tutorial to learn how to apply an edge detection kernel.
