
This tutorial will show you how to convert a sprite to a binary image inside a GLSL shader. A binary image uses only two colours, usually black and white. In pixel art this is often called 1-Bit.
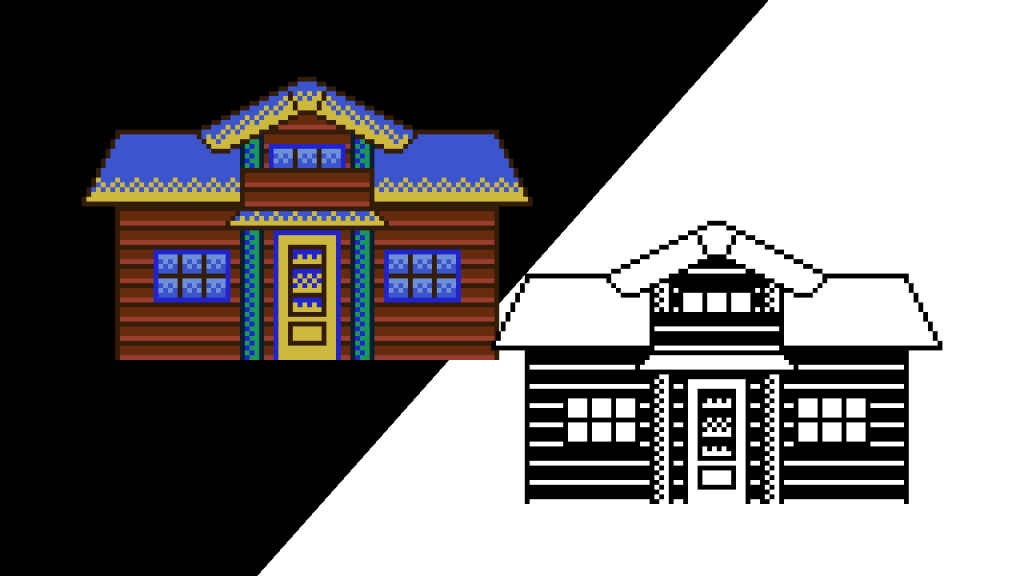
I will use this sprite of a snow cabin which I created in Aseprite.

Step 1: Get pixel colour
Get the current pixel colour.
fragColour = texture(textureUnit, texCoord);
Step 2: Convert to greyscale
Convert the current pixel colour to greyscale.
const vec3 GREY_WEIGHTS = vec3(0.299f, 0.587f, 0.114f);
float greyscaleValue = dot(fragColour.rgb, GREY_WEIGHTS);

Step 3: Select colours
Select two colours and pass them in as uniforms. I chose to use black and white.
uniform vec3 shadow = vec3(0.0f);
uniform vec3 highlight = vec3(1.0f);
Step 4: Bias
This uniform variable represents the bias towards one colour. For example if I use black and white. A low bias would favour white, whilst a high bias would favour black. The bias uniform should be in the 0 to 1 range.
uniform float bias = 0.5f;
The code snippet below uses the ternary operator to select either the highlight or shadow colour based on a comparison between the greyscale value and the bias.
fragColour.rgb = greyscaleValue > bias ? highlight : shadow;
But it could be written with a standard if else statement like so:
	if(greyscaleValue > bias)
	{
		fragColour.rgb = highlight;
	}
	else
	{
		fragColour.rgb = shadow;
	}
However I recommend using the ternary operator, as it may be more optimised.
If the bias is 0, you will only get white.

If the bias is 1, you will only get black.

A bias of around 0.3 or 30% works nicely for this image.

Feel free to experiment with different colours and bias values.
Thank you for reading this tutorial, I hope you found it useful!
