
This tutorial will show you how to create a duotone gradient in a GLSL shader.
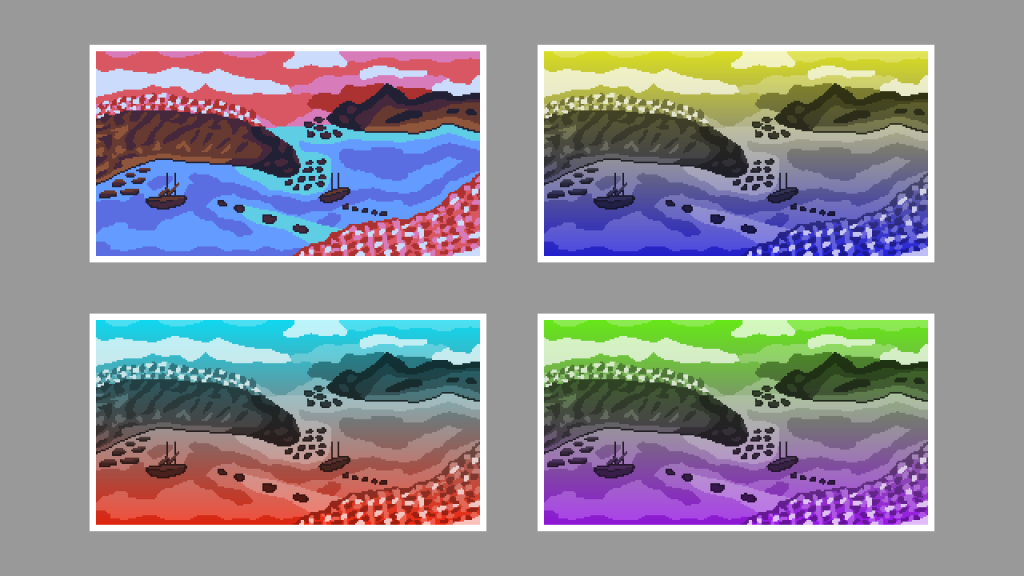
I will be using this Shan Shui style sprite I created in Aseprite.

Step 1: Get pixel colour
Get the current pixel colour.
vec4 pixel = texture(textureUnit, texCoord);Step 2: Convert to greyscale
Convert the pixel colour to greyscale.
const vec3 GREY_WEIGHTS = vec3(0.299f, 0.587f, 0.114f);
vec3 greyscalePixel = vec3(dot(pixel.rgb, GREY_WEIGHTS));
Step 3: Gradient
Determine the gradient direction using the texture coordinates. The texture coordinates are in the range of 0 to 1, and are used to create a greyscale gradient. This code will make a vertical gradient with the highlight starting at the top, and ending with the shadow at the bottom of the sprite.
float g = 1.0f - texCoord.y;This is what we would get if we outputted the current gradient to the screen.
fragColour.rgb = vec3(g);
Step 4: Overlay
You will need to select two colours and pass them into the shader. I called the colours shadow and highlight.
uniform vec3 shadow;
uniform vec3 highlight;
Overlay the greyscale pixel with the mix of the shadow and highlight colours. The amount of highlight vs shadow is determined by the greyscale gradient value.
fragColour.rgb = Overlay(greyscalePixel, mix(shadow, highlight, g));Here are the overlay functions, more information here.
float Overlay(float a, float b)
{
	if(a < 0.5f) return 2.0f * a * b;
	return 1.0f - 2.0f * (1.0f - a) * (1.0f - b);
}

vec3 Overlay(vec3 a, vec3 b)
{
	float red = Overlay(a.r, b.r);
	float green = Overlay(a.g, b.g);
	float blue = Overlay(a.b, b.b);
	return vec3(red, green, blue);
}
Step 5: Set pixel alpha
Finally set the output alpha to value of the current pixel alpha.
fragColour.a = pixel.a;Feel free to experiment with different colours and gradients.


Thank you for reading this tutorial, I hope you found it useful!
See this tutorial for how to create a duotone gradient in GIMP.

4 responses to “Creating a duotone gradient in a GLSL shader”
Used a lot of gradients in my work I just go about it in a different approach. warps the mind sometimes thinking what it has to be before the gradient is applied, like having to blow out the lights or darks (over sat) so it’s muted in the after.
As a former military training instructor I will say your instructions are well presented. thanks for your support of my project!
ttfn sm101
Thanks for your comment, and your military service. Your content looks great also! It must be challenging to display portrait images on a landscape website background. I’ve been sticking to landscape and square images intentionally for my posts. I am sure you could write some interesting tutorials (if you had the time). Changing the image settings before applying the gradient definitely makes a difference.
In the beginning my work started with requests from friends for some custom wallpapers for their telegram chats and various banners for rumble content. I design mostly for mobile phones and tabs because most my people are professional telecom and the phone is where they are most of the time. So getting full view for some may require expanding but, expansion is a principle of our lives, if your not expanding your probably dead inside..
Well your site looks great on desktop and mobile. I could easily see the content 🙂