
This tutorial shows you how to apply a sepia effect to a sprite using a shader. The code is written in the GLSL programming language.
What is Sepia?
“Sepia is a reddish-brown color, named after the rich brown pigment derived from the ink sac of the common cuttlefish Sepia.”
Sepia (color) – Wikipedia
Sprites
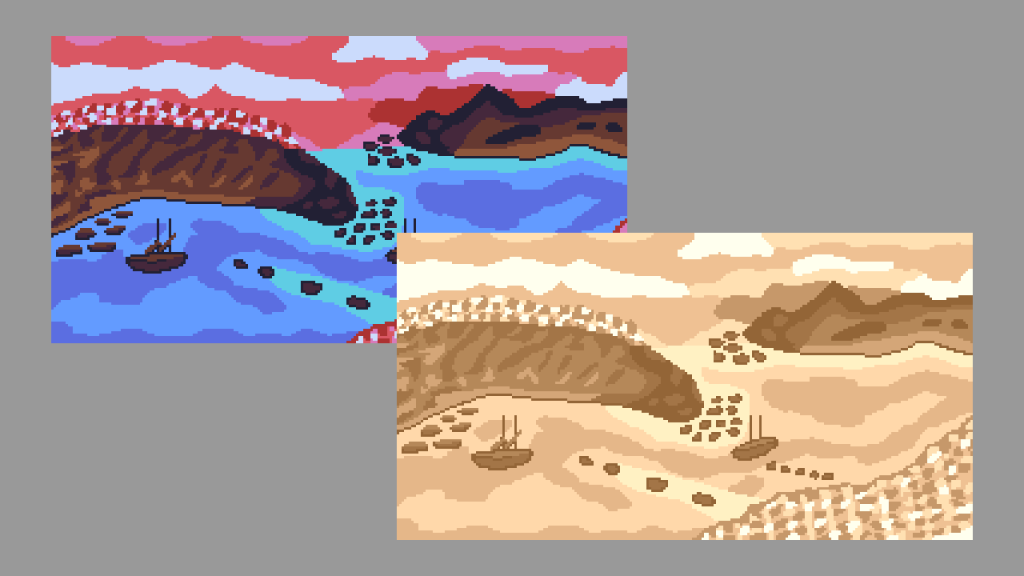
Original sprite

Sepia sprite

Full GLSL shader code
#version 330 core

uniform sampler2D textureUnit;

// Range from 0.0f to 1.0f
uniform float intensity = 1.0f;

in vec2 texCoord;

out vec4 fragColour;

const vec3 GREY_WEIGHTS = vec3(0.299f, 0.587f, 0.114f);

vec3 SEPIA_WEIGHTS = vec3(112.0f, 66.0f, 20.0f) / 255.0f;

void main()
{
	vec4 pixel = texture(textureUnit, texCoord);

	// Convert pixel colour to greyscale
	vec3 result = vec3(dot(pixel.rgb, GREY_WEIGHTS));

	// Add sepia weights
	result += SEPIA_WEIGHTS;

	fragColour.rgb = mix(pixel.rgb, result, intensity);
	fragColour.a = pixel.a;
}
Explanation
We first get the pixel colour and convert the pixel colour to greyscale using the GREY_WEIGHTS.
vec4 pixel = texture(textureUnit, texCoord);

// Convert pixel colour to greyscale
vec3 result = vec3(dot(pixel.rgb, GREY_WEIGHTS));
More information on the greyscale algorithm here:
Greyscale sprite shader – Agate DRAGON
We then add the SEPIA_WEIGHTS to the greyscale colour, to get the sepia colour.
result += SEPIA_WEIGHTS;The SEPIA_WEIGHTS are calculated from the RGB value taken from the sepia Wikipedia page, and converted into the 0 to 1 range by dividing by 255.
vec3 SEPIA_WEIGHTS = vec3(112.0f, 66.0f, 20.0f) / 255.0f;Finally we just need to mix the original pixel colour with the sepia colour, using the intensity value to control the strength of the effect.
fragColour.rgb = mix(pixel.rgb, result, intensity);
fragColour.a = pixel.a;Thank you for reading this tutorial, I hope you found it useful!
